![]()
Android development is to jump start by installing the components needed for the development.
This is the guide for installation although the android developers website provide much help for newbie developers,I will try with some screen shots and some solution for common errors during the installation.
How to make Android apps:
Step 1 – Check basic requirements
what will you need ?
Eclipse IDE for Android:
Download Eclipse IDE from http://www.eclipse.org/downloads/ , select the java developers package or java EE developer package.You will get an zip file after downloading,Extract it to some location in your local drives.[ Do Extract the package and dont run the application as is in zip file ]
Java Developers Kit(JDK)
Download JDK 5 or 6
from http://java.sun.com/javase/downloads/index.jsp and complete the installation.
Step 2 – Installing Android development tool (ADT) for eclipse IDE
You have to install the ADT plugin to your Eclipse IDE inorder to develop androidapplications.You cannot directly download this ADT plugin,you can only download through the IDE interface.
Now run the Eclipse application and select Help > Install New Software.
In the Available Software dialog box, click Add
Provide a name for your remote site ex: Android plugin
In the Location field, enter the URL: http://dl-ssl.google.com/android/eclipse/
[I am using http instead of https to avoid the "Failed to fetch" error.]
Now you will see a window like shown below,check the developer tools check box to select DDMS and development tools.click Next

click Next and accept the terms and conditions and click Finish.
Step – 3 Install the android Software development Kit(SDK)
Download the android SDK for windows,Mac and linux and extract to a location and run SDK Setup.exe [ Location of this SDK setup is to be
After some moments android SDK and AVD manager will start and you will be prompted to select the packages you wish to install,select as per your needs but minimum you have to select one platform ex- android 2.2, android 2.1 etc
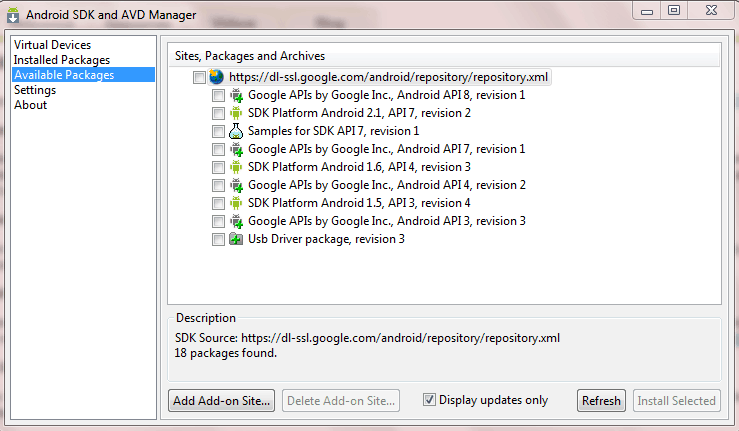
Then click install selected
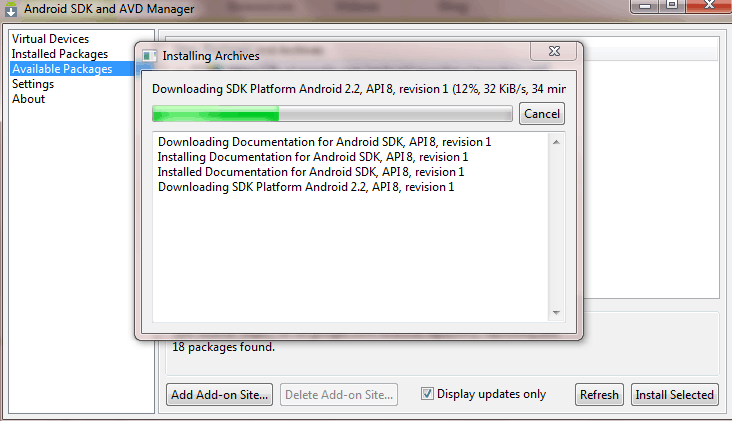
Wait for the installation to complete.[Here I have selected SDK API,documentation,Platform and samples.
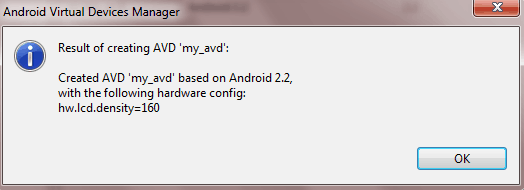
Step 4 - Setting up Android Virtual Device (AVD )
Android virtual device is the emulator that provides the virtual output for our applications.
In Android SDK and AVD Manager go to Virtual devices and select-> New
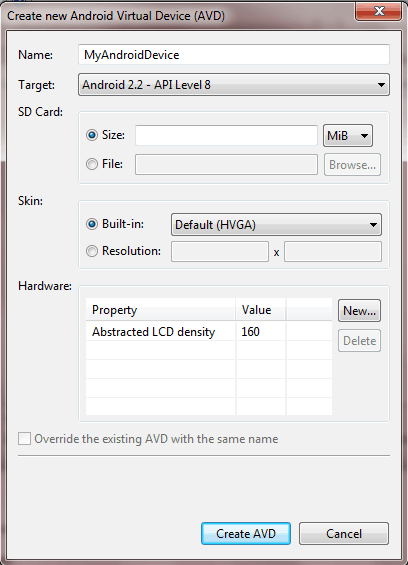
provide the name of the virtual device and select target to your installed platform.here I have installed android 2.2.If it can’t able to select the target then you didn’t installed anyandroid platform packages.
Leave the other settings as is [ This setting is used for emulator configuration] click create AVD and OK
Step 5 – Configuring Eclipse ADT
Before starting to develop applications,you need to configure eclipse ADT plugin to properly work with SDK.
Open Eclipse IDE and click window then preferences and select Android in the left pane.
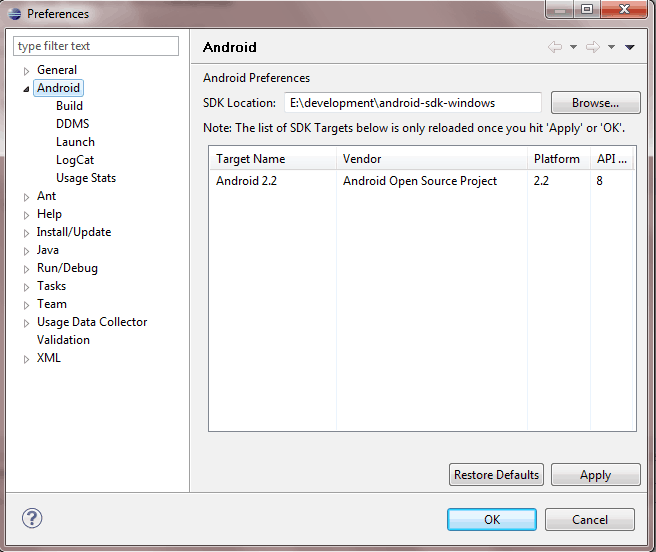
Now click browse and select the path where the android SDK is extracted in step 3 click apply and OK.If selected correctly the target name will be displayed in the window.If not selected the target name won’t be displayed.
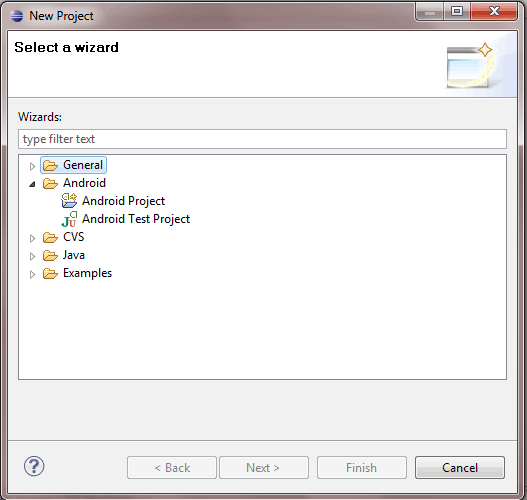
Step 6 – Starting an android project
The trouble some part is over. Now click file-> New->Project in Eclipse
Select Android->Android project >
Select
- Project name: HelloAndroid
- Application name: Hello, Android
- Package name: com.example.helloandroid
- Create Activity: HelloAndroid
Click finish.
Now the application is ready,Your Android project is now ready. Open the HelloAndroid.java file, located inside HelloAndroid > src > com.example.helloandroid
Change the code to
package com.example.helloandroid;
import android.app.Activity;
import android.os.Bundle;
import android.widget.TextView;
public class HelloAndroid extends Activity {
/** Called when the activity is first created. */
@Override
public void onCreate(Bundle savedInstanceState) {
super.onCreate(savedInstanceState);
TextView tv = new TextView(this);
tv.setText("Hello, Android");
setContentView(tv);
}
}
Step 7 – Run your first mobile application
Select run->run->android application
The android emulator will show up.It will take some time for the dive to boot up for first time.
android helloworld app


 About UsFind out working team
 AdverisementBoost your business at
 Need Help?Just send us a
 We are SocialTake us near to you,